I was down at a Department of Motor Vehicles office yesterday getting a license plate for my new trailer, which went smoothly - yay.
On the spur of the moment, I asked the clerk about licensing requirements for homemade boats. The answer was unpleasant - the state expects you to present receipts for all materials used to build the boat, so that they can verify that you paid state sales tax (which is what we have in Washington state anyway - hey it beats an income tax!) on everything. Lacking receipts, you must declare a fair market value for the boat, and the state immediately makes you pay the full sales tax rate for that amount before you can get your hull identification #. Furthermore, you do not get a real title until three years after that point. I suspect the implication of that policy is that you can use but not sell the boat - not that I am intending to! :) - until that three year period is expired.
A long time ago, I remember saying something about how I didn't want to be tied down in the financial details while building this boat - i.e., the "plan" was to just get what I needed when I needed it, and not get lost in budgeting details. (Also, this may have been motivated by a subconscious fear of just how much money I was going to spend in total...) I am now kicking myself for that attitude, because it's going to cost me a significant amount of money depending on what fair market value I eventually declare. Worse, I just hate the idea of the state double-dipping into me on taxes!
May be it won't be so bad though - this is a real crappy boat I've built here, really no more valuable than some old wooden rowboat if we're all being honest with each other, right? ;-)
Joking aside, I'd urge other home boat builders to look into the licensing requirements for their state at an early stage, ideally before you even start building.
Thursday, December 17, 2015
Monday, December 14, 2015
Trailer center bunk started
After some research on the best trailer bunk material (lignum vitae, anyone?) I chose to use 1/2" thick strips of Douglas fir. The plans call for the bunk to be 1.5" thick by 8" wide. As usual I over-thought the details and ended up with the following plan; the varying widths of the strips are intended to keep the vertical gaps non-aligned:
If you add up the dimensions for each layer, you should come up with 8" for each one. Let me tell you, it takes some effort to come up with this many details for what in the end is a simple board. :)
Here is the center line of the boat marked out, with the beginning and end of the bunk also marked:

The "layup" - if you can call it that - was quite a chore. Access to the top (bottom) of the boat was difficult from a ladder, and once things were underway I could no longer climb on top. Because there were so many layers with so much bog to mix and apply, I was really racing the clock and thank goodness for the cold weather (in the 40's deg F) or I probably would not have made it. This is after layer two is on, with bog, but before the glass layer is on:

Dealing with so many darn strips of wood was a real pain as well. However overall I am glad I did it that way as the resultant bunk so far seems to have conformed very well to the hull bottom, both fore-aft as well as side-to-side.
Almost done, notice my high-tech board clamping technique (duct tape):

You might be able to see in the above picture that I have a length of plastic taped to the hull below the wood strips. This was to prevent epoxy\bog from getting on the hull (I still got some on it here and there), and also because I planned to vacuum bag the whole thing to the hull. Turned out I didn't have any vacuum bag film, so I tried to use plastic sheeting, and also had to use duct tape to seal most of the plastic. The vacuum attempt was a failure - never got above 5 lbs of pressure. Ah well, I think I am ok anyway.
I did all of the above work before going to L.A. to get my trailer (see previous post). Yesterday I took the bunk off of the boat - I am pleased so far, the bunk is very heavy and stiff.
Here you can see the gentle bow the hull form gave it:

The end section after I trimmed the bunk to length (this is the bow end):

The ends looked ok as far as voids, but I had a hard time keeping some of the narrow strips from bowing sideways in the middle. This has left me with several long gaps to fill with bog:

I know, not perfect but I think it will work.
Next up is filling the gaps, cleaning up and glassing the edges (and the raw wood inner surface seen above), sealing everything with epoxy, and maybe even fairing\painting. I will be stapling trailer carpet to it as the final step.
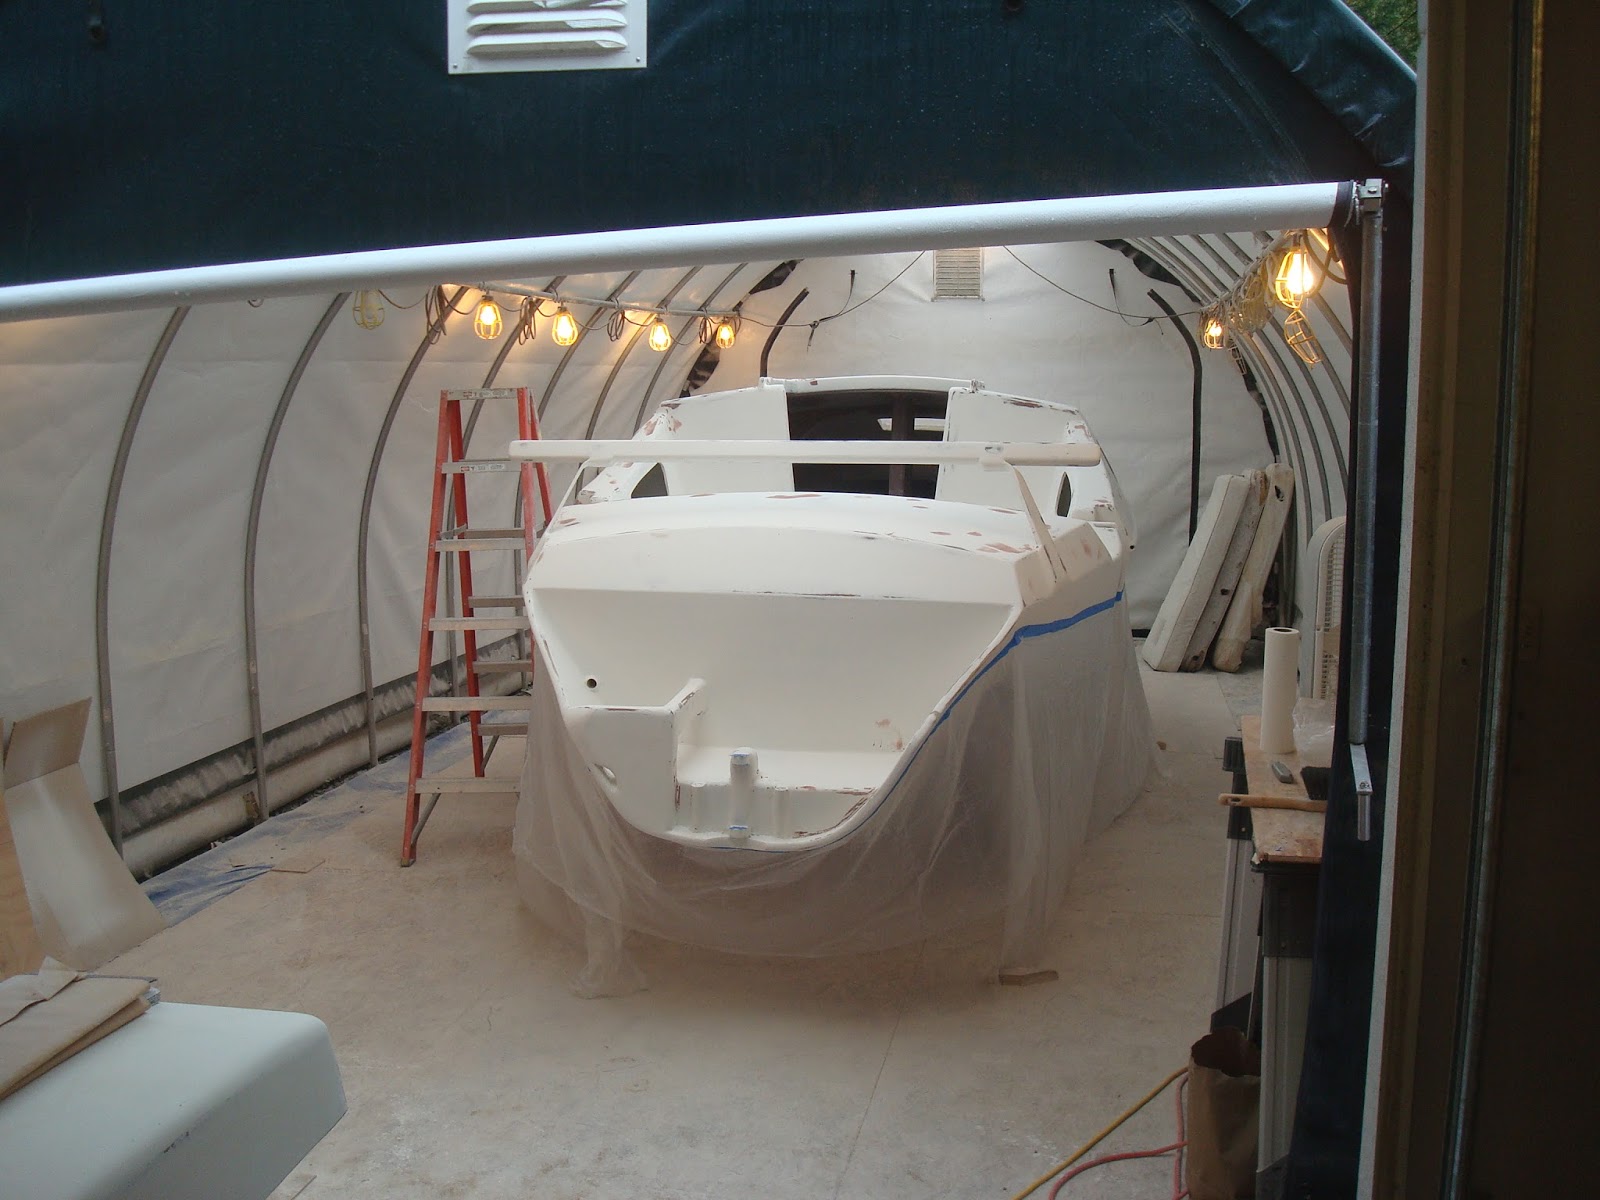
In other news: I will be flipping the boat over for the last time tomorrow, and will hopefully be able to finish up the interior painting soon (with the help of my portable heater). It has gotten too cold (darn it) to finish the exterior painting unless I get lucky with a warm day at the right time. Still, making progress.
(------layer of fiberglass-------)
1" 1.5" 3" 1.5" 1"
(------layer of fiberglass-------)
.75" 1.5" 3.5" 1.5" .75"
(------layer of fiberglass-------)
1.25" 1.25" 3" 1.25" 1.25"
(------layer of fiberglass-------)
If you add up the dimensions for each layer, you should come up with 8" for each one. Let me tell you, it takes some effort to come up with this many details for what in the end is a simple board. :)
Here is the center line of the boat marked out, with the beginning and end of the bunk also marked:

The "layup" - if you can call it that - was quite a chore. Access to the top (bottom) of the boat was difficult from a ladder, and once things were underway I could no longer climb on top. Because there were so many layers with so much bog to mix and apply, I was really racing the clock and thank goodness for the cold weather (in the 40's deg F) or I probably would not have made it. This is after layer two is on, with bog, but before the glass layer is on:

Dealing with so many darn strips of wood was a real pain as well. However overall I am glad I did it that way as the resultant bunk so far seems to have conformed very well to the hull bottom, both fore-aft as well as side-to-side.
Almost done, notice my high-tech board clamping technique (duct tape):

You might be able to see in the above picture that I have a length of plastic taped to the hull below the wood strips. This was to prevent epoxy\bog from getting on the hull (I still got some on it here and there), and also because I planned to vacuum bag the whole thing to the hull. Turned out I didn't have any vacuum bag film, so I tried to use plastic sheeting, and also had to use duct tape to seal most of the plastic. The vacuum attempt was a failure - never got above 5 lbs of pressure. Ah well, I think I am ok anyway.
I did all of the above work before going to L.A. to get my trailer (see previous post). Yesterday I took the bunk off of the boat - I am pleased so far, the bunk is very heavy and stiff.
Here you can see the gentle bow the hull form gave it:

The end section after I trimmed the bunk to length (this is the bow end):

The ends looked ok as far as voids, but I had a hard time keeping some of the narrow strips from bowing sideways in the middle. This has left me with several long gaps to fill with bog:

I know, not perfect but I think it will work.
Next up is filling the gaps, cleaning up and glassing the edges (and the raw wood inner surface seen above), sealing everything with epoxy, and maybe even fairing\painting. I will be stapling trailer carpet to it as the final step.
In other news: I will be flipping the boat over for the last time tomorrow, and will hopefully be able to finish up the interior painting soon (with the help of my portable heater). It has gotten too cold (darn it) to finish the exterior painting unless I get lucky with a warm day at the right time. Still, making progress.
Sunday, December 13, 2015
Picked up new trailer
A couple months back I ordered a custom trailer from ABTrailers down in California. I started out by emailing a PDF copy of the trailer plan sheet (sheet 60) to AB, then had multiple phone conversations from there to nail down various details. Alex (owner of AB) has built multiple trailers of this type (including one for Rod Tharp - a local F32 builder; Rod gave me some good feedback and also had some useful pictures to look at). Alex was very responsive, spent a lot of time on the phone with me, and answered every question I had.
Some folks asked me why not just go with a local builder, answer is that I wanted to go with a stable company, familiar with boats of this type (trimarans), who produced a reputable product in aluminum (I wanted the corrosion resistance). When considering how long I will have this trailer, a quick trip down to California is not a big deal.
My wife and I left last Wednesday around noon-ish, and arrived in San Bernardino (yes the same one as the recent terror attack tragedy) around 7pm on Thursday. People of southern California\LA: I feel very sorry for you - you must have done something awful in a past life to have to live in such a place with such horrible, horrible traffic jams. I think we spent 2+ hours in stop-and-go traffic on I210, which was aggravating since we had just spent another 2+ hours in stop-and-go in the hills north of Santa Clarita due to an accident.
Anyway, back to boat stuff. After a good night's sleep, we got to AB at 8am on Friday. Here's my truck with the trailer hooked up for the first time (the non-descript building to the left is the new world headquarters of AB):

This is Alex talking with my wife:

The trailer is almost entirely aluminum except for the axle cross-member and the tongue shaft. It has electric-over-hydraulic (disc) brakes, which apparently is over-kill for a trailer of this size and weight, but oh well. It has LED lights, and a full-sized spare too :). In case you are wondering, the center support bunk is my responsibility and I have already started working on that (more details later). The side hull supports and the float supports you see above will likely need some adjusting but that's no big deal.
This was the first time I've ever towed a trailer, so I was very nervous at first but things settled down pretty quickly. The trailer tracks nice and straight and didn't bounce around as much I thought it would. It would have been easy (almost) to forget it was back there. We had a good trip and made it home safe and sound :).
Sunday, November 15, 2015
More interior paint
I have been working in little bits here and there, adding more primer and paint to the interior.
Initial primer on lower deck areas and you can also see some of the aft cabin tunnel:

I ran out of white finish primer fairly soon and have been using up my dark gray primer instead, in case you're wondering about the color switch.
Initial primer on fwd beam bulkhead, window sides, and most of daggerboard case:

The tunnel to the aft cabin is now mostly painted:

I had to tent the boat with some plastic in order to be able to trap the heat from a small heater:

Primer on main cabin bulkhead:

I even painted part of the underside of the settee support bulkhead, in case anyone ever grabs underneath there:

This was right after I put on my last coat for tonight:

I only have the aft cabin left to do; part of that is already been faired so hopefully not too much longer to final boat flip.
Wednesday, October 28, 2015
First interior paint
I brushed two coats on the interior forward section tonight. The gray color we selected looks pretty nice (of course this is late at night, daytime may be different):

I am glad that section is done - the area is very cramped for me, had to be careful not to roll over into the fresh paint on the other side... :) Now I just need to keep working backwards from there, until it's time to flip the boat back upright.

I am glad that section is done - the area is very cramped for me, had to be careful not to roll over into the fresh paint on the other side... :) Now I just need to keep working backwards from there, until it's time to flip the boat back upright.
Sunday, October 25, 2015
Bottom painted
I spent Friday evening and all day yesterday sanding down the finish primer on the boat bottom. Mostly this was all machine sanding, first 180 grit, then 220, then 320. Fortunately I was able to complete the sanding and also the prep work by Saturday evening. Prep work always takes longer than expected - use compressed air to blow off the boat, vacuum the hull, sweep up the tent floor, move items out of the tent that shouldn't get overspray, do a complete solvent wipedown of all surfaces to be painted, and finally, mask off the boat.
Today was the fun part - I sprayed three coats of paint. Yay!
Overall it went well but I think my first coat was the best one - got some runs in the second two coats, not sure if I care enough to sand them out or anything.
Here's a few pictures, it was getting dark out so these are not the best.
After third coat:

Another one after third coat:

This is after the first coat (you can still see some finish primer lines) but it sure looks nice anyway:

Obviously I will have some paint-line-blending to do when I spray the top of the boat. Not looking forward to that but I've chatted with the Alexseal tech rep and I think I have a plan to get it done. The boat will stay upside-down a week or so, to give the new paint time to cure and to give me time to paint interior areas.
The painting guides always tell you to take notes, normally I never bother but this time I did. For future reference, and in case it helps anyone else:
First coat
Started spraying @9:50am, finished spraying ~10:35am
Outside temp 51 deg F
Mixed 32oz+32oz base+converter, plus 1 capful accelerator
Reducer ratio ~30% (using "superfast" converter)
laid down light coat only
gnats a bit of a problem
Way too much material leftover
Second coat
Tried to pick a few gnat carcasses out of the paint - hard to do
Started spraying @12:50pm, finished at ~1:30pm
Outside temp 61 deg F
Mixed 32oz+32oz base+converter, plus 1 capful accelerator
Reducer ratio ~34% (using "fast" converter)
Laid down a slightly heavier coat this time
Gnats not so bad this time
Still had too much material leftover despite the heavier coat
The higher reduction ratio seemed to work well, I could see "flow-out" happening almost immediately. Cross fingers no runs. Edit: crossing fingers didn't work :(.
Third coat
Tried to pick a few gnat carcasses out of the paint - hard to do
Started spraying @3:30pm, finished at ~4:05pm
Outside temp 62 deg F
Mixed 24oz+24oz base+converter, plus 1 capful accelerator
Reducer ratio ~34% (using "fast" converter)
Laid down a medium coat this time
Not as much wastage this time
Even using an HLVP system, by the time each coat was done there was a lot of overspray in the air. Wish I had a fan blowing through the tent, but I was afraid of blowing dust onto the fresh paint surface, and also of creating an explosion hazard. Ok maybe I'm a 'fraidy-cat but better safe than sorry.
I think my lesson-learned for when I paint the top of the boat, is to keep all coats nice and thin, so as to avoid runs. On the other hand, you still need enough reduction to get that nice flow-out resulting in that nice shiny surface. I think three thin coats would have still resulted in adequate coverage but without the runs.
Monday, October 19, 2015
More primer and other progress
My wife and I took a trip to Philadelphia last month for a week. Four days before we left, a tiny, tiny, $2.95 rubber part that seals the spray gun trigger rod on my new spray gun fell off and was lost. And no local suppliers - very frustrating, this resulted in four days of less-than-expected-productivity.
The gun I'm talking about is a new Lex-Aire Pro Series TA spray gun I got earlier this year after trying (poorly) to disassemble and rebuild the original gun that came with my sprayer. The Lex-Aire is all-metal and much easier to keep clean. Other than the one part falling off, it has worked well.
Anyway, here's some boat progress pics.
Boat masked and prepped for finish primer coat(s):

It was after I sprayed the first coat on the above, that the spray gun part fell off - which meant I got to sand everything down again (to 150 grit).
My "paint station":

Perhaps the spray gun snafu was for the best, I used some of the time to do my wingnet cutouts:

After our Philly trip I finished up the finish primer coats on the upper half of the boat. Then we flipped the boat back over (without mishap this time) and I got things ready for finish primer (three coats) on the bottom, which I sprayed yesterday. First coat was dark gray:

Here is a video of me spraying the first white primer coat:
Even after the two white coats, you can still tell that dark gray is under there on the bottom as compared to the top:

Due to the cooler weather I am giving these primer coats a few days to cure, so I started getting ready to paint the interior. After going back and forth on using full-bore marine paint vs latex, I finally decided to do it right ($$$ marine paint). This was taken after brushing on a couple of primer coats to the forward interior:

My wife wanted a neutral color for the interior, we are going with Alexseal's Whisper Gray. I will use the same color for the non-skid areas on the main hull and floats.
The gun I'm talking about is a new Lex-Aire Pro Series TA spray gun I got earlier this year after trying (poorly) to disassemble and rebuild the original gun that came with my sprayer. The Lex-Aire is all-metal and much easier to keep clean. Other than the one part falling off, it has worked well.
Anyway, here's some boat progress pics.
Boat masked and prepped for finish primer coat(s):
It was after I sprayed the first coat on the above, that the spray gun part fell off - which meant I got to sand everything down again (to 150 grit).
My "paint station":

Perhaps the spray gun snafu was for the best, I used some of the time to do my wingnet cutouts:

After our Philly trip I finished up the finish primer coats on the upper half of the boat. Then we flipped the boat back over (without mishap this time) and I got things ready for finish primer (three coats) on the bottom, which I sprayed yesterday. First coat was dark gray:

Here is a video of me spraying the first white primer coat:
Even after the two white coats, you can still tell that dark gray is under there on the bottom as compared to the top:

Due to the cooler weather I am giving these primer coats a few days to cure, so I started getting ready to paint the interior. After going back and forth on using full-bore marine paint vs latex, I finally decided to do it right ($$$ marine paint). This was taken after brushing on a couple of primer coats to the forward interior:

My wife wanted a neutral color for the interior, we are going with Alexseal's Whisper Gray. I will use the same color for the non-skid areas on the main hull and floats.
Monday, September 14, 2015
Fairing progress
Finally got to take some vacation this year, and family was informed in advance that most of it was going to my boat. That sounds a bit mean, but I really need to finish this thing sooner or later and it won't happen on its own.
I don't have pictures for most of progress this year so far, but in summary: sanded down last year's primer coat on the bottom of the boat, faired\fixed a bunch of imperfections, sprayed more primer, more sanding, got it down to 150 grit and looking (and feeling) pretty good.
At that point my son helped me flip the boat over, but to be honest the weight of the boat took us by surprise and the boat bottom dragged against some of the tent frames as it rotated on the way down, leaving some minor gouges, I need to fix that later.
Once flipped, more sanding, spray primer, more sanding. My goal is to get some paint on this thing before I go back to work, but the weather is marginal and I may not make it.
Removing the foam core around the windows and filling it with epoxy is a catchup job that I left for too long, finally finished it up:

Sanding around beam mounts is a chore:

Took me about nine hours of sanding today to do the entire upper half of the boat. Feels like most of my expensive primer ends up as a dust cloud - thank goodness for respirators. Nice to see it with a more uniform color:
 I am still using the Alexseal paint system, which means I have another layer of finish primer to apply before getting to the top coat.
I don't have pictures for most of progress this year so far, but in summary: sanded down last year's primer coat on the bottom of the boat, faired\fixed a bunch of imperfections, sprayed more primer, more sanding, got it down to 150 grit and looking (and feeling) pretty good.
At that point my son helped me flip the boat over, but to be honest the weight of the boat took us by surprise and the boat bottom dragged against some of the tent frames as it rotated on the way down, leaving some minor gouges, I need to fix that later.
Once flipped, more sanding, spray primer, more sanding. My goal is to get some paint on this thing before I go back to work, but the weather is marginal and I may not make it.
Removing the foam core around the windows and filling it with epoxy is a catchup job that I left for too long, finally finished it up:

Sanding around beam mounts is a chore:

Took me about nine hours of sanding today to do the entire upper half of the boat. Feels like most of my expensive primer ends up as a dust cloud - thank goodness for respirators. Nice to see it with a more uniform color:

Sunday, September 13, 2015
Catchup post - 2014 progress
I'm trying to catch the blog up, hence this belated post. Not much to show, but I did work on the boat a little bit last year. Same old story - working a lot, six-day weeks for almost two years in a row (I like my job so this is not as bad as it sounds). Also, looking back at my picture archive, I did virtually nothing in 2013 (spent most of my vacation time on a three-week trip to Europe) so don't expect a catchup post for that year.
In September 2014 I found some time to continue fairing the bottom of the boat. I decided to apply a skim coat of epoxy just to seal things up (and hopefully to help fix some of the minor imperfections). This picture was taken right before I applied the epoxy:

As you can tell, the masking was quite rudimentary. I wish I had some pictures of the epoxy coating, but as I recall it was one giant sticky mess - not fun.
After sanding the epoxy coat smooth, I applied three coats of high-build primer:

And then that's how things sat over the winter.
Subscribe to:
Comments (Atom)
