Here's the port rear coaming, after a lot of trial-and-error trimming:

Unfortunately I made a minor mistake back when I was taping in the cockpit seats, by fiting & taping the seat all the way up next to the beam mount recess glass. Here's the part I need to cut away in order to attach the rear coaming panels per plan:

After I realized my mistake, I looked more closely at the various plan sheets, and sure enough the information was there had I just read things more carefully. That happens more often than I'd like to admit. RTFM! Anyway, the inner coaming side pieces are bogged into place, tomorrow I start taping them:
 On the bright side, having to trim the seat (right next to the beam mount and outer hull) motivated me to invest in my very own Fein Multimaster. A very nice tool, but pricey - yet, it's really an investment that I can use on lots of other projects. :)
You can also see in the above pictures that the forward coaming tops are glued on, and you can also see that I have opted to trim the cockpit side to be flush with the seat; originally I was going to extend the coaming all the way back, but I had second thoughts after wondering where any water on the seat would go. This way hopefully it drains right over the side.
I have also formed the flat spot for the mast step, along with trimming\blending the last exterior beam mount.
I have the aft-cabin traveller almost done. Here I'm getting ready to laminate the blank:
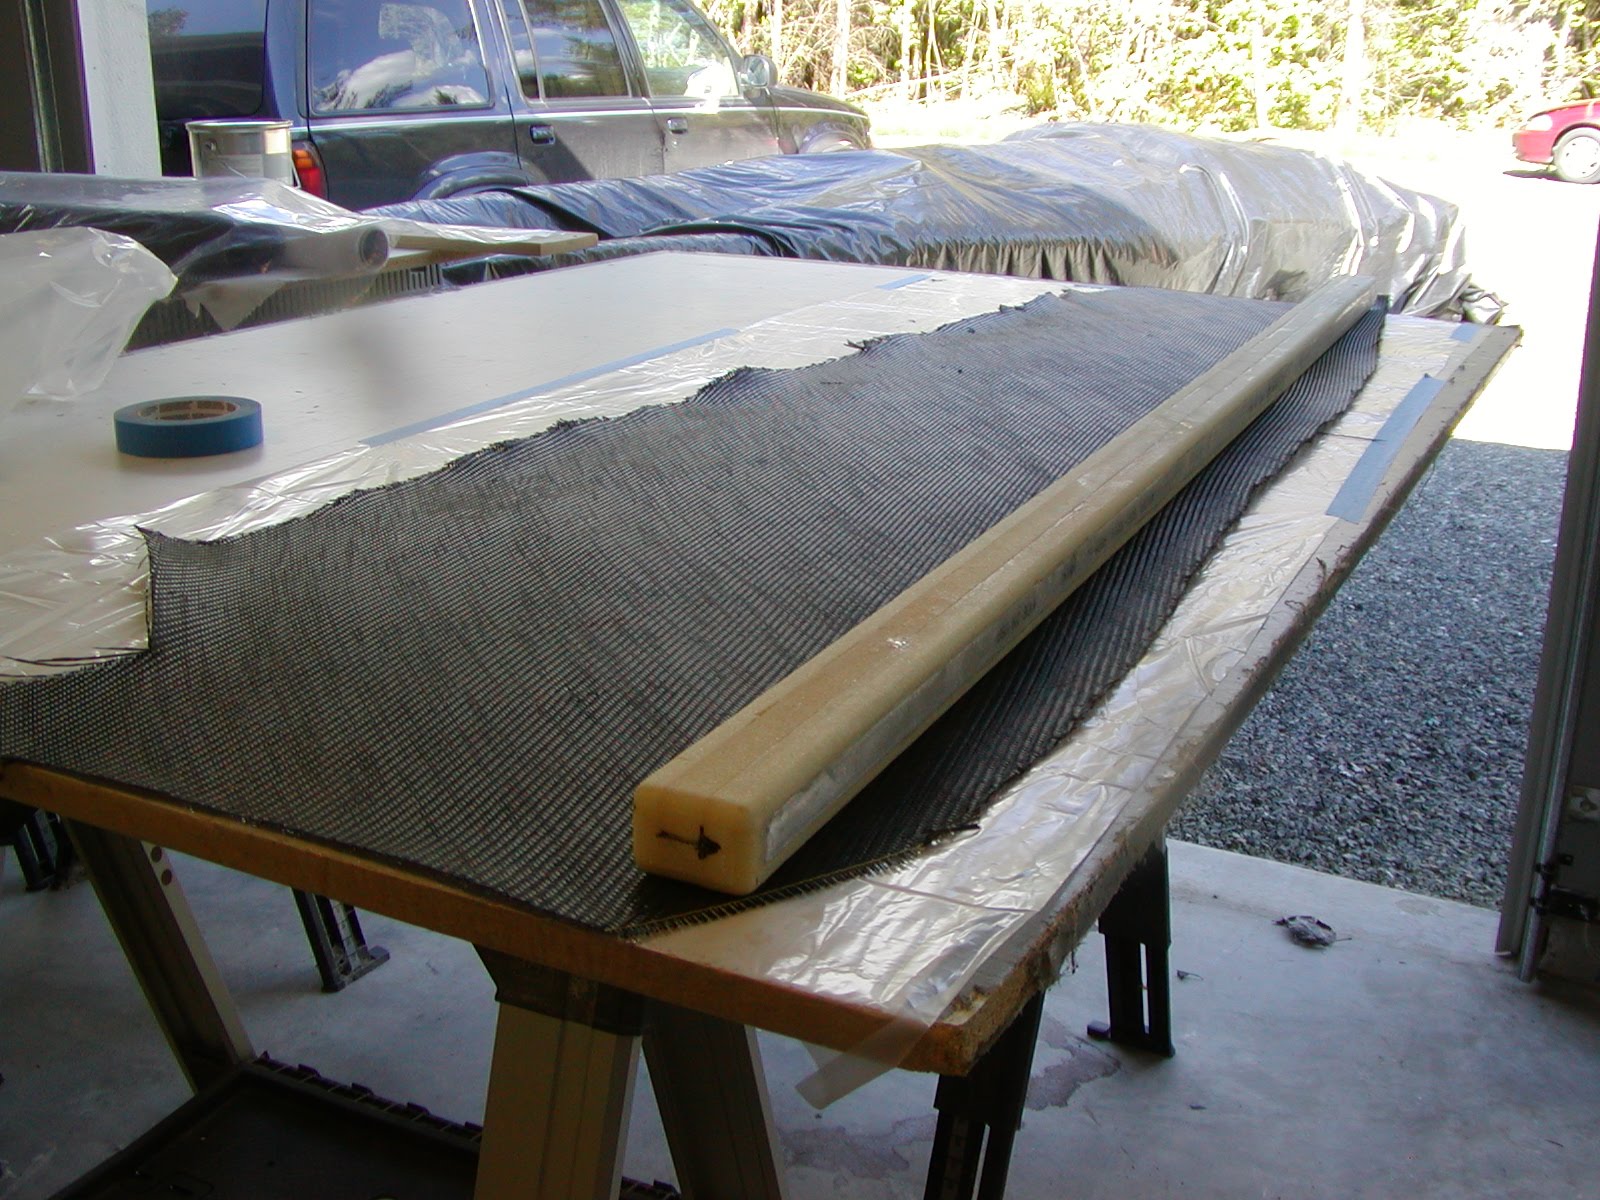 I regret now, buying so much 4.2 oz/yd^2 carbon fiber uni glass, since the plans called for several layers of 13 oz glass. So for every plan-specified layer (four of them), I had to actually cut and laminate three layers of the 4.2 oz stuff, for a grand total of twelve layers. My 4.2oz uni came in a 12" wide roll, so I had to trim it up:
 Laminating so many very thin and long (6') layers of carbon has other challenges too: really need to watch out for air entrapment, and it is harder to keep so many layers from moving around while you're working out any bubbles. Both sides of the traveller have their uni done now, moving on next to glassing the ends and the final carbon wrap. So far it's turning out really nice, will post a pic when done.
One thing: after laminating the uni onto the first side (bottom) of the traveller, I set it out in the sun to cure, on top of the black plastic covering my floats. I swear that the traveller was 100% straight and plumb before that - but when I went out to check it, the heat from the sun and the black plastic warped it slightly, resulting in a very slight bow in the middle (in the vertical direction). I am still scratching my head on this, it doesn't seem possible especially with the aluminum insert running the length of the traveller. Weird - but I'm not going to worry about it for now.
I've been working on the daggerboard too, trying to finish the fairing. Here I'm chugging away, drilling a knot-retaining hole on the wrong side of the board:
 Not sure how I did that. Note to self: see comment above, under Plans: Not Reading Closely Enough. I repaired the damage by packing the useless hole with high-density bog, which will hopefully wear better than the cedar, so maybe it turned out okay.

1 comment:
Our traveler was perfectly straight as well but developed a slight downward bow in the center in the vertical direction. Not quite 1/4". Did mine clamped to a straight 2x4 and the carbon was in a 45x45 "sock" with heat-shrink tubing to get excess air out. Still not sure how the bend got in there - perfectly straight in the other direction.
I don't think it will ever get noticed.... :)
Post a Comment