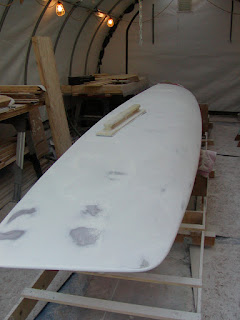
On Thursday evening, I sanded down the primer on the starboard float. This was a lot of fun - not. You really should enjoy working in the middle of billowing clouds of dust, if you want to build a boat. I started with the deck first:
 Then did each side:
 This made for a very, very long evening. After sanding down the starboard float, I could tell that there were still several minor imperfections left. Some could be taken care of by an additional coat of primer, others needed a dab or so of fairing compound. I added the fairing compound that evening right before quitting time:
 On Friday evening, I sanded down the spots where I had added fairing compound. Then my wife and son helped me hang the float back up from the chains, and then I applied an additional coat of primer.
Saturday morning, I woke up motivated to do some sanding. I wanted to work on the starboard float again, but the extra primer coat hadn't quite cured enough, so it turned out to be the port float's turn. The port float sanded down very nicely, IMO -- it took about eight hours of sanding to get it all done. Here's one view of the deck-side join:

Builder tip: my sandpaper has been clogging pretty badly, and at first I was replacing it quite often. Then I discovered that a dust brush will easily swish off most of the clogged material, allowing you to continue using the sandpaper. Sandpaper is expensive, so best to conserve it where possible.
Another builder tip: sweatbands are an important piece of equipment for a boat builder. I suggest having plenty on hand. :)
Today I spent sanding down the extra primer coat on the starboard float. It wasn't as bad as the initial sanding, but still took about five hours. The extra primer coat helped fill in a lot of tiny holes. I'm now wishing, that I had applied four coats of primer on each float to begin with - it would have helped to fill more imperfections and made it easier to sand them down to a smooth coat. Even better I guess, would have been to make sure the rough-fairing was closer to perfect than I made it. I have a lot of respect for folks who can quickly and efficiently produce nicely faired and painted boats -- it is not easy work.
The starboard float is now ready for finish primer, and the port float is ready either for finish primer, or perhaps one more super-build coat. The weather is on the rainy\chilly side today, or I would have considered doing that before quitting for the day.
Last thing I did today, was hang up the port float to get it ready for either one more coat of super-build primer, or for the initial coats of finish primer:
That's it for now. I didn't make any progress on anything else, having spent all of my spare time sanding.


No comments:
Post a Comment