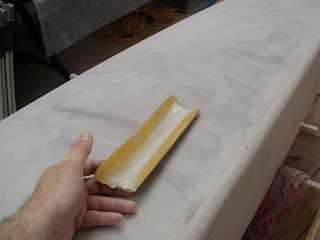
This past week I managed to do one sand & fill pass every night after work, and 3 passes yesterday. At this rate, I hope to be applying primer to both floats around the middle of June.
I've been taking a lot of pictures, but I think it is hard to really tell the quality of the work from the pictures - you really need to be there to gauge how good or bad the fairing is. And I'm certainly no expert - that said, here's some more pictures and notes.
For some reason I hadn't found time to go pick up a darn notched trowel, and so last Sunday I decided to just get on with the job the same as before. So here's the float side, part-way through covering it with a thin coat of fairing compound:
 This float side has very few bubble patches, and the fairing work went pretty smoothly -- but it's still hard work. The longboarding motion very much resembles an upper chest bench press workout in the gym (a place I haven't visited in too many years) -- I was getting a bit sore earlier in the week. This is a picture partway through the initial longboarding:
 When longboarding the bow area, I use a tiedown strap to hold the stern down:


I think my starboard transom area is looking pretty good too; the longboard doesn't help much here, it takes careful hand sanding:
I've also been working on my port float deck and its inner deck-to-side radius join: My Ronstan inspection ports finally showed up. I am not 100% happy with them. True, they do have the nice wide top that covers up the screws, but they felt relatively flimsy to me compared to the Beckson and Tempress models that I've looked at it. There's almost zero ribbing underneath the top of the hatch - some folks (especially one particularly hefty boat builder) could step on it someday and crack it. I am still pondering, but there's a good chance I'll end up returning them.
Ian sent out a F22 builder's update mail today. Lots of stuff mentioned, but the most important one IMO is that he is going to be printing and sending out updated plan books. I am happy with this -- there've been a lot of PDF updates sent out, but it's easier to keep track if everything is up-to-date in the plan book.
Oops, this post is getting a bit long. Sorry. One last bit of info: I should be on vacation from work the week of 6/4-6/8. Nine glorious days of...fairing. :) At least progress should be rapid, if I can get 3 sand\fill passes in each day. I also need to get started on my daggerboard case, for which I have the mold all ready from last winter.


1 comment:
Posts can never be to long. Keep those cards and letters coming.For creating the radious on your floats try a wood working trick. Find your self a flat piece of metal and cut the shape of your radious in it.Take a piece of hard rod, a srew driver might do, stock the curve to put a hook/burr on the edge of it. This hook will cut ten times faster then snad paper. Your miles ahead of me so let me know how this works. Its the cats meow on custom molsings
Tom
F22#45 Teachers Pet
Post a Comment