Sunday, November 25, 2007

Starboard cockpit floor taped

I'm really speeding along here at one bulkhead per day. Still, better safe than sorry with these slow cure times. Here's the cockpit floor after taping:

Here's a view of the underside:

I also got the aft cabin bunktop taping areas ready, for doing the flange for the starboard bunktop half. I think I will put the port hull half back on the 2x4's, then slide it over to the side so that I can work on that flange from the outside of the hull - it would be very difficult to do it from the inside. But that will be the last thing I do - I don't want to move the port hull half until absolutely necessary, in order to keep everything aligned as possible. Overall, the bulkhead alignments are turning out really nice - I am pleased.

I'll have to squirm through that passageway above to get to the aft cabin, when I tape the aft cabin fwd bulkhead - ought to be a lot of fun. :)

Also got the beam mount flange extensions trimmed. First I made a template that matched the side-profile:

(That side flange has a lot of squandered glass and epoxy -- in retrospect, I could have used 7"x10" pieces of glass to reduce the wastage. But it's not that big of a deal.)

After marking the side profile with the template, I used the jigsaw to cut off the really big chunks. After that, it was full speed ahead with the sander (hallelujah for 40 grit!), grinding all of the edges into shape. I am very pleased with how they turned out -- from some angles, it's hard to tell which half of the flange was the original. Here's the finished mounts:

And from another view:

With the beam mounts done, all I need now is a joined hull to install them in.

Saturday, November 24, 2007

Beam mount lower flange extensions

Originally had planned to do more bulkhead taping work today, but it was cold enough that I chickened out and decided to work on the beam mount extensions instead, at least until it warmed up. Working on the beam mounts took a lot longer than I expected though and that's all I ended up doing today.

First up was finishing off the mold pieces. I essentially followed the plans, except that I still didn't want to drill any holes in my beam mounts (yet, anyway). The clamp-only strategy worked well:

The mold surface is still in two pieces in the above picture. I decided to leave them clamped to the beam mounts while bogging the "V" joint, so the parts would be accurately joined as possible. So I used masking tape to protect the mounts, then added the bog:

After a quick cure in front of the fireplace, I sanded down the mold surfaces til smooth and added (clear) masking tape:

I couldn't feel any "wax" on the surface of the beam mounts, but since this is such a critical area I decided to be extra careful: first a careful de-greasing\de-waxing, then a thorough sanding on the surfaces to be laminated against, then another de-greasing to help get all of the dust off. The attachment points on the beam mounts are as clean as I could get them.

Attaching a temporary block along the center-line of the mold surface helps hold it in the right location against the mount, until clamped down:

First layer of glass on the first beam mount:

I found 8" x 10" to be a good size to cut the "C" glass to -- big enough to cover the area without too much excessive overhang.

Starting on the uni pieces:

When I got to my third beam mount, I realized (or remembered?), that the four uni layers can be stacked and consolidated separately from the mount, then added to the mount laminate -- just seemed easier that way.

One more piece of peel-ply to go on the first beam mount:

Need lots of glass pieces for this job:

Finally all done:

Laminating all four mounts took me four hours -- I sweated over each piece of glass, trying to keep the glass\resin ratio as high as possible, given the critical nature of these parts. Tomorrow I'll trim them up and post some pictures of the results.

Friday, November 23, 2007

Starboard main cabin bulkhead taped

Several things got done today. First, the main cabin aft bulkhead is now taped in:

Having to climb through the main hatch hole is a lot of fun now; haven't had to bend like that since my days as a circus performer (yeah right - but if I can do it, anyone can). The weather is still chilly so I left the main hull alone for the rest of the day so the taping could cure (don't want to risk kicking that bulkhead loose while it's still green).

Next was re-cutting the slots on the bow web. I did my best, but cured bog has a tendency to chip when being cut with a saw blade, so the job didn't turn out as neat as I would like. My neighbor (thanks Bill!) then helped me drill the holes. First we leveled the bow web as best we could: the tube is level, but the rest of it is best-effort by eyeball. I now have two reference points to use when mounting/levelling the web in the hull.

Check this drilling setup out:

That drill has a magnetic base; once the magnet was turned on I couldn't budge the thing at all - woof!

I am slightly nervous about the bow pole pivot hole -- it's in about the right place, but it's hard to locate the hole center from the FSP now that all of the glass is in place (plus, even this web is still a bit "chunky" - I'm not going to do it again though! :).

I also did the top flange extensions on the aft beam mounts. Here's the scheme I came up with to form the mold surface, without having to drill any holes in the mount:

I got both extensions laminated, here's one of them:

Finally, I also started making the mold pieces for the lower beam mount flange extensions and hope to get those done this weekend as well.

Thursday, November 22, 2007

Starboard aft beam bulkhead taped

My wife is just sooooo nice to me -- despite today being Thanksgiving holiday, she let me go ahead and do some boat work today. Just too cold outside to do much (woke up to 27 deg F/~-3 deg C this morning), but I did get the aft beam bulkhead taped:

That bright spot is a flashlight shining through from underneath, in case you're wondering. I used it to help locate the edge of the form frame.

After the beam bulkhead was taped, I did some more work on the new bow web (see previous post).

For fun, I dug up a picture to show what I was working on last year, on Thanksgiving 2006. Turns out that I layed my very first pieces of float foam that very day:

Looking at that picture, I'm struck by three things: first, how far I've come in one year; second, how much cleaner my tent was back then; and third, how much more room I had when doing the floats. :)

Anyway, Happy Thanksgiving to everyone out there. Time for some turkey dinner and pecan pie, yum!

Bow web, take three

I decided to produce another bow web. This is my third one, and I think I'm getting better at it. :) I delayed posting any details about it until it was basically complete, so I could get it all in one post. Much of this info has already been posted (on this blog or elsewhere), but I figured I'd write it all up since I had the pictures anyway. Hope it's helpful to someone.

New foam blank, with high-density pieces ready to glue in:

After tapering the upper portion of the web on the table saw, I glue the G10 tube on top (btw, make sure you sand the G10 til rough - it's smooth when new and I don't trust it):

After that cures, I sand it smooth and get ready for the initial wrap of C glass:

You can obviously tell where that piece of glass is going to go. Not shown but done at the same time as the above piece was the extra 3" piece of C over the tube.

Back when I initially started the project I ordered five yards of DB glass (w/o mat) from Noahs, thinking that this would be easier to use than rotating BD glass 45 degrees. The DB glass was a disappointment -- it was extremely fragile and hard to use; I would not recommend using it.

After that cures and gets cleaned up (stray glass cut or sanded away), it's time to do the rest of the bare edges. Here's the bottom wrap going on:

After applying peelply:

I've struggled to get glass to wrap and stick around curved edges like this. One thing that seems to help, is putting a very thin layer of bog over the curve and the nearby foam\glass, right before wrapping the glass around the curve. The bog seems to act as a nice filler layer between the previous layer and the new glass, helping it to stick nice and tight and filling in any potential voids.

Similar procedures were used to wrap the front and rear edges of the bow web - I use multiple narrow pieces of peelply on the sharply curved sections, since peelply doesn't stretch and conform too well in those areas.

I bagged on the straight layers of carbon fiber:

For my second bow web, for some reason I thought I had ran out of the "good" carbon fiber, i.e. the nice Hexcel product I ordered from Ian at the beginning of the project. So I ended up using a lighter weight of carbon fiber, which had to be tripled-up to get the minimum weight, which partially accounts for the chunkiness of that bow web. (I tossed out my first bow web attempt before ever getting to the carbon fiber stage. :) Turns out I still had some of Ian's carbon fiber hiding on a shelf; had barely enough left to do the rest of the bow web, but this did require some edge-butting, hence the narrow double pieces here:
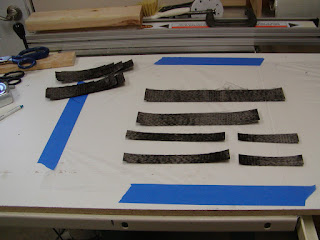
Marking the location of the carbon fiber:

And curing in front of the fireplace after laminating and peelply are done:


If you look closely on the front two carbon layers, you can see that there are five layers there not four -- I had two short pieces of carbon left over, and decided to go ahead and use them on the web.

I really like how things cure nice and fast in front of that fireplace. Mom, thanks again for the candleholders; they're working great!

Here's how the web was looking at that point:

Next step was filling in between the layers of carbon:

After sanding that down, I was now ready for the final covering of C glass, this is the first layer:

Those stripes look kinda cool -- like a giant piece of candy or something. :) The two extra layers of glass over the nose ended up making it look a bit bulbous in that area - unavoidable, I guess.

After the whole web was done, it was time for slot-cutting. I decided to dado-cut the slots, using a jig I came up with:

There are actually two metal rods, one from each end of the web, spaced - in this picture - so that there is room to cut the biggest slot which I did first. They are attached to two wood blocks whose hole-centers are precisely 5/8" from the table saw surface (actually, they are the same blocks I used for making the bog-washers for the float chainplates). This setup located the G10 tubing parallel to the saw surface, with the tubing center 5/8" away, so to cut the specified 5/8" depth (below the G10 tube, into the web), I set the blade height at 1 1/4". It was more difficult to get the web vertical to the saw surface -- there are no "known" surfaces on the outside of the web, so I had to eye-ball that part.

After the last slot was cut:

Looking at the cross-sections is fun:

Next up is making insulating washers\layers (and sealing the foam) out of bog:

Tomorrow I'll re-cut the slots to size and then this job is done - will edit this post to add a picture of the final product.

Wednesday, November 21, 2007

Starboard bulkhead progress

The weather really sucks - woke up to clear skies and a 31 deg F (~-1 deg C) morning, lots of frost on the ground, yadda yadda. All of my taping from yesterday was still quite green and tacky. Hard to get motivated to work outside at those temps. Makes me wish it would rain, since the cloud cover would help keep things warm.

Inspecting yesterday's tape jobs:

Forward beam bulkhead taped:

Upper rear aft cabin bulkhead taped outside:

...and inside:

Wanted to get the aft beam bulkhead done, but dark falls fast these days. Ah well, there's always tomorrow.

Tuesday, November 20, 2007

Starting starboard hull half bulkheads

Regrettably, I had to work a huge number of hours last week and was unable to do any work on the boat. Then life (and getting ready for the impending holidays) caught up with me over the weekend, and I didn't do much then either.
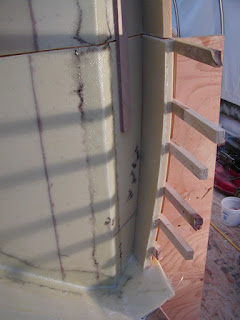
Yesterday I finally started prepping the main hull halves for joining. I'll be honest - I'm nervous about how well my bulkheads will line up. To relieve my fears, I temporarily joined the hull halves together (using Menno's very nice technique - thanks Menno for figuring that out) so I could mark the exact locations of the bulkheads. This was also useful as a dry-run for the final joining, when I get to that.

So where am I at? I taped in three bulkheads today, plus the aft-cabin floor stub bulkhead. Here's the two fwd bunk bulkheads:

And the aft-cabin lower rear bulkhead:

It was comical trying to tape the fwd-most bunk bulkhead, when working underneath the other hull half like this. I'd slither up as far as I could go, only to start sliding back down on the gunwale in short order. Need to have Spiderman hands, I guess.

I also decided to make another bow web; it is turning out very nice this time. I'm going to finish it first, then post all of the details in a single post - should be ready in a couple of days.

Saturday, November 10, 2007

Upper starboard hull half laminated

I laminated the upper hull half last night -- it was a very cloudy day, which helped keeped the outdoor temperature reasonably high (low-mid 50's deg F). Working by myself, I started around 4:30pm and got done close to 10pm. Long night but I was glad to get it over with.

This morning I got to work checking for bubbles and sanding down the laminate. Overall it turned out well - a few small bubbles but nothing too concerning. Here's the new laminate, and a pile of sanding dust (my $(@)!@($* dust hose connector fell off the hose, and I can't get it connected again):

After patching the bubbles, I worked on trial-fitting the fwd beam bulkhead. That said, my plan has always been to lay the port hull half on top of this one so that I can get the bulkheads lined up exactly. Since the weather was nice today, I figured I might as well get the port hull half moved back in side the tent. Fortunately my neighbors were once again willing and able (thanks guys!) to help out. My wife was home this time and took a short video clip of the action:


The fit to the starboard hull half is overall extremely good . There is however a large gap between the fwd deck sections, I am not sure what caused this; maybe the hull deformed slightly while sitting in the back yard? (Ah, the trials and tribulations of a backyard boat builder.)

A tent-ful of boat (anyone want to buy some sawhorses - cheap?):

A view from the inside:

Tomorrow I'll fine-tune the placement of the port hull half, and get started marking bulkhead locations. Should be fun, crawling around inside of there.

One more thing: my rudder web is very nearly complete, and is turning out very, very nice. (IMO, of course). Here I'm putting on the extra two layers of carbon fiber on the lower gudgeon:

And this is after vacuum bagging on the uni-glass on both sides of the web:

Earlier today I laminated on the extra layer of C around the lower gudgeon, all that is left now is the cosmetic glass around the gudgeons.

Sunday, November 4, 2007

Upper starboard hull half planked

Poor me -- things are busy at work and I didn't touch a piece of foam all week long. :-)

Mid-way through upper hull battens and planking:

This is how it looked after I finished up for tonight:

This is a bit of a minor milestone - I'm done with the foam planking, after four float halves and two main hull halves. Hopefully I'll have time to bog between the planks this week, then laminate first thing next weekend.

I thought I did a good job on the rudder gudgeons last weekend, but after taking a closer look at them it turned out that I didn't trim them very square to the tube. I could make them work, but I figured I wouldn't be very happy about it. So yesterday I made two more gudgeons - my third set, in case anyone's counting. Here's the method I figured out for trimming them:

Have to be careful not to extend the steel rod too far, so the blade doesn't cut into it (didn't happen to me, I'm just mentioning it). This worked much better, I was very pleased with how they turned out.

Glueing the gudgeons onto the foam web:

Next is laminating a layer of C all over the web. On my first bow web (side note: I've done two bow webs, and am thinking of doing another after seeing the nice svelte one on Oliver's boat; mine is kinda chunky) I remember I tried to wrap a gigantic piece of fiberglass all around the entire web. It didn't work very well and Ian's recommendation was to piece several sections around the web - it is perfectly fine as long as you have good overlaps. Here's the first section of C on my rudder web:

The two rectangular pieces of glass went over the gudgeons themselves. I didn't finish covering the entire rudder web yet.

I also poured my daggerboard case keel insert this weekend. I left one spacer in the case as per the plans, and stuffed a long vinyl tube down from the top until it was about 3-4 inches above the bottom:

Rather than place the dry glass at the bottom of the case, I mixed in chopped glass into my resin before pouring it down the tube (either option is fine according to the plans). I dropped down to using medium-speed hardener so that I'd have plenty of time to pour, and to reduce the chances of excess heat. The procedure went very smooth and I now have a nice slab of cured resin at the bottom of the case. By the way, the case is nicely balanced and will stand up by itself on the floor. Also, I weighed the case - came in at 19.4 lbs (8.8kg).

Now that I'm done planking, it raises the question of what will I do with all of the scrap foam I have. After spending a fortune on the stuff, I hate to just throw it away - but I don't want this stuff sitting in my shed forever. Some other builder - one more patient, economical, and cost-conscious than me - could save a bundle, if they were willing to do some work. Anyway, if you're local to the Seattle area and are interested, send me an email. I have one full sheet of A550 3/8", three 1/4 sheet of A1200 3/4" (way over-ordered there), three 1/2 sheets of A500 3/4", and a mixed-up ton of smaller A400\500\550 scraps. Scraps are especially good for flat panels IMO.